
Embarking on a DIY garage coating project requires careful consideration and attention to detail. Beyond simply selecting the appropriate products and preparing the surface thoroughly, the key to success lies in mastering the nuances of application techniques and post-coating maintenance. Achieving a flawless finish demands precision and patience, whether you’re rolling on epoxy or applying a polyurethane sealant. Proper mixing, application in optimal conditions, and meticulous attention to detail during the curing process can mean the difference between a surface that withstands the test of time and one that chips and peels prematurely.
Moreover, maintaining the coated surface is essential for preserving its integrity and appearance over the long term. Regular cleaning to remove dirt, debris, and spills, as well as periodic reapplication of protective coatings or sealants, will help prolong the life of your garage floor coating.
Additionally, being proactive in addressing any signs of wear or damage, such as scratches or stains, can prevent them from escalating into larger issues that necessitate costly repairs. By honing your skills in application and maintenance, you can ensure that your DIY garage coating not only enhances the aesthetics of your space but also provides lasting durability and protection for years to come.
Choosing the Right Coating Products
When selecting the proper coating products for your DIY garage project, consider the specific needs and conditions of your space. One key decision to make is choosing between epoxy and polyurethane coatings. Epoxy coatings are durable and resistant to stains and chemicals, making them ideal for high-traffic areas like garages. On the other hand, polyurethane coatings provide a glossy finish and are more flexible, making them better suited for surfaces that may experience movement or vibrations.
Another important consideration is whether to opt for a solvent-based or water-based coating. Solvent-based coatings are known for their durability and resistance to chemicals, but they can emit strong odors during application and require proper ventilation. Water-based coatings, on the other hand, have lower levels of volatile organic compounds (VOCs), making them more environmentally friendly and safer to use indoors. They also have a quicker drying time, allowing you to finish your project faster.
Ultimately, the choice between epoxy and polyurethane coatings as well as solvent-based and water-based coatings will depend on your specific needs and preferences. Consider factors such as durability, odor sensitivity, drying time, and environmental impact when making your decision. By selecting the right coating products for your DIY garage project, you can ensure a successful outcome that meets both your functional and aesthetic requirements.
Proper Surface Preparation
To achieve a successful DIY garage coating, it’s crucial to properly prepare the surface before application. Start by thoroughly cleaning the garage floor to remove any dirt, oil, or grease. Use a degreaser and scrub brush to ensure a clean surface for the coating to adhere to. Once the floor is clean, allow it to dry completely before proceeding.
Next, consider the use of sanding techniques to roughen up the surface. This step is essential for promoting better adhesion of the coating. You can use a floor sander or even a simple handheld sander to scuff up the floor. Be sure to wear a mask and goggles during this process to protect yourself from dust and debris.
After sanding, thoroughly clean the floor again to remove any dust or particles left behind. A vacuum or shop vac can be helpful in this step to ensure a clean surface for the coating. Pay close attention to corners and edges where debris can accumulate.
Essential Tools and Equipment
For a successful DIY garage coating, having the right tools and equipment is essential in ensuring a smooth application process and professional-looking results. Safety precautions are paramount, so make sure to wear protective gear such as goggles, gloves, and a mask when working with chemicals or power tools. Cost-effective options can be found for most tools, but remember that investing in quality equipment can make a significant difference in the outcome of your project.
When preparing for your garage coating project, gather the following essential tools and equipment: a pressure washer for thorough cleaning, a floor grinder or sander to smooth out imperfections, an epoxy mixing paddle for proper blending, and a long-handled roller for even application. Additionally, consider using a squeegee for spreading the coating and an edging brush for precise edges and corners.
To ensure a safe working environment, set up proper ventilation with fans or open windows and doors. Keep a fire extinguisher nearby as a precaution. When choosing tools and equipment, opt for cost-effective options without compromising on quality. Look for bundle deals or rental options to save money without sacrificing performance.
Application Techniques and Tips
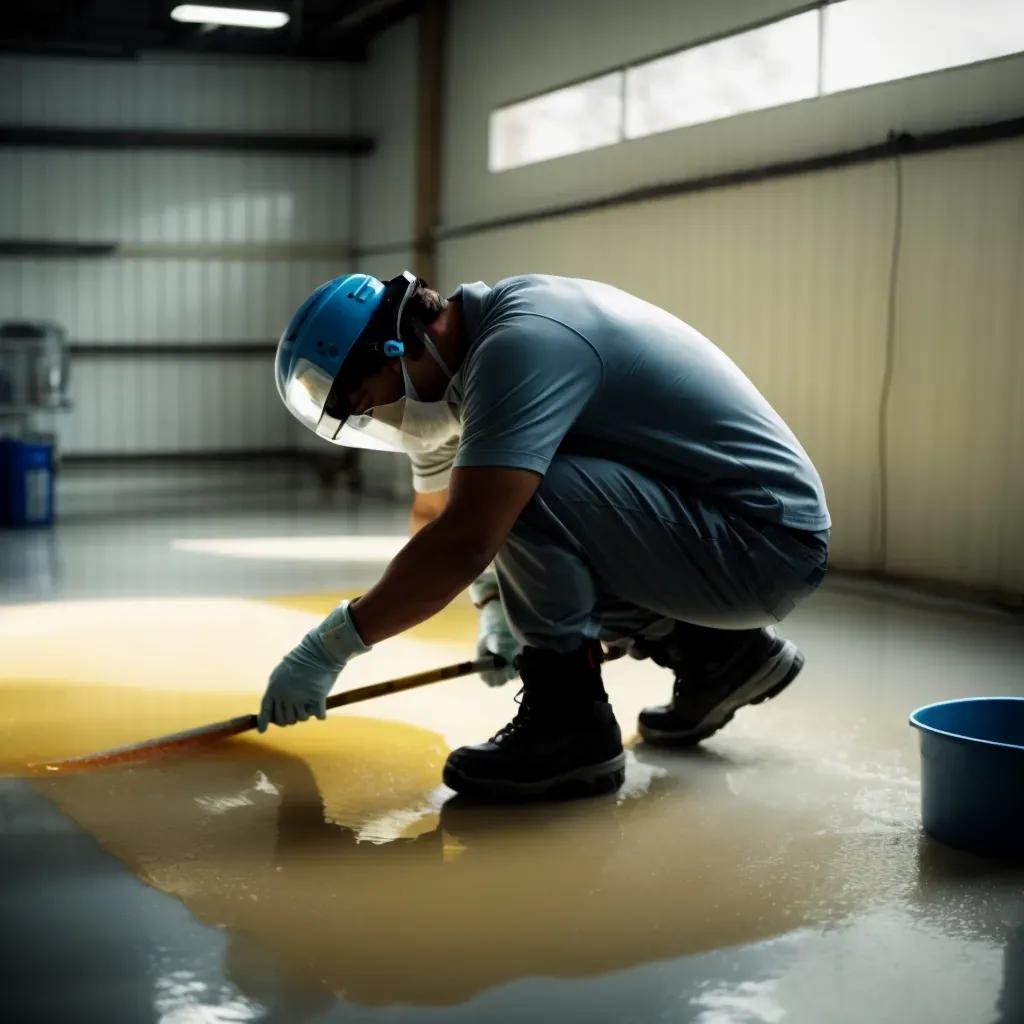
Mastering the application techniques is crucial for achieving a flawless finish on your DIY garage coating. When it comes to applying the coating, choosing between a roller and a sprayer is a key decision. Rollers are great for smaller areas and provide better control, making them ideal for beginners. On the other hand, sprayers are efficient for larger surfaces, ensuring a quicker application process.
Before diving into the application process, ensure you have the right mixing ratios. Properly mixing the coating material is essential for its effectiveness and durability. Follow the manufacturer’s instructions carefully to achieve the best results.
When using a roller, start by cutting in the edges with a brush for a clean finish. Then, work in small sections, applying the coating in even strokes to avoid uneven coverage. For sprayers, maintain a consistent distance from the surface to ensure uniform application.
Maintenance and Longevity
Ensuring regular upkeep of your DIY garage coating is essential for maintaining its longevity and quality. By following some simple maintenance tips, you can reap the longevity benefits of your coating while keeping your garage looking fresh and organized.
To begin, regularly sweep your garage floor to remove debris and dirt that can scratch or damage the coating over time. This simple task can prevent premature wear and tear, preserving the quality of your DIY coating. Additionally, consider mopping the floor with a gentle cleanser to remove stains and spills promptly. This proactive approach will help maintain the appearance of your garage and extend the lifespan of the coating.
Furthermore, inspect your garage coating periodically for any signs of damage, such as peeling or chipping. Addressing these issues promptly can prevent them from spreading and causing more significant problems. For minor touch-ups, keep some extra coating material on hand to repair any imperfections quickly.
Conclusion
In conclusion, mastering the art of DIY garage coating requires attention to detail and dedication. By carefully selecting the appropriate products, meticulously preparing the surface, and utilizing the right tools and techniques, you can achieve a stunning finish that will endure for years. However, the journey doesn’t end with the application – regular maintenance is essential to preserve the coating’s appearance and integrity over time. With consistent care and upkeep, your garage can be transformed into a showroom-worthy space that not only enhances your home’s aesthetic appeal but also stands as a testament to your craftsmanship. So, roll up your sleeves, put in a little elbow grease, and get ready to turn your garage into an envy-inducing showcase that will leave your neighbors impressed.


