Get your concrete prepped by first sweeping away debris and cleaning with a pressure washer. Apply a degreaser, rinse, and let it dry. Repair cracks by cleaning them, filling with suitable filler, and allowing it to dry. Remove stains cautiously, identify them, and test cleaning solutions. Etch the concrete by applying the solution, scrubbing, rinsing, and letting it dry. Test moisture levels, apply primer evenly, and fill joints and gaps meticulously. Finally, inspect, clean thoroughly, repair, etch, and apply epoxy diligently for a flawless finish.
Surface Cleaning
To ensure a successful epoxy coating application, begin by thoroughly cleaning the concrete surface. This step is crucial as it creates a clean canvas for the epoxy to adhere to, ensuring a long-lasting and durable finish.
Start by sweeping the surface with a broom to remove any loose debris like dirt, dust, or small stones. Next, use a pressure washer to thoroughly clean the concrete and remove any stubborn stains or dirt buildup. Make sure to pay extra attention to corners and edges where dirt tends to accumulate.
After pressure washing, it’s essential to use a degreaser to remove any oil or grease spots that could prevent the epoxy from bonding properly. Apply the degreaser as per the manufacturer’s instructions and scrub the area with a stiff brush to ensure thorough cleaning.
Once you’ve cleaned the entire surface, rinse it thoroughly with clean water and allow it to dry completely before proceeding with the epoxy application.
Repairing Cracks
Begin by examining the concrete surface for any cracks that need repair before applying the epoxy coating. Cracks can be unsightly and may compromise the integrity of the epoxy coating if left unattended.
To repair cracks effectively, start by cleaning out any debris or loose concrete from the crevices. Use a wire brush or compressed air to ensure the crack is clean and ready for repair.
Once the crack is clean, it’s time to fill it in. Choose a high-quality concrete crack filler that’s suitable for the size of the crack you’re repairing. Apply the filler using a putty knife, making sure to smooth it out evenly along the surface. Allow the filler to dry completely as per the manufacturer’s instructions before proceeding.
For larger cracks or those that are more severe, consider using a concrete patching compound. These compounds are designed to provide a stronger repair for more significant damage. Follow the manufacturer’s guidelines for mixing and applying the compound to ensure a durable and long-lasting repair.
After repairing the cracks, take the time to inspect the entire surface for any other areas that may need attention.
Once all the repairs are complete, you can proceed with confidence knowing that your concrete surface is ready for the epoxy coating application.
Removing Stains
Identifying stains correctly is crucial before proceeding with removal. You can employ various cleaning techniques based on the type of stain present.
Following proper surface preparation tips will ensure successful stain removal and a clean surface ready for epoxy coating.
Stain Identification Methods
When inspecting concrete for stains, start by visually examining the surface for any discoloration. Stains on concrete can be caused by various substances like oil, grease, rust, or even mold and mildew. Identifying the type of stain is crucial in determining the best removal method to ensure a clean surface for epoxy coating application.
To identify stains effectively, consider the location and color of the discoloration. For instance, oil and grease stains are often dark and splotchy, while rust stains appear reddish-brown. Mold and mildew stains usually present as green or black patches. Additionally, consider the texture of the stain – whether it’s oily, powdery, or slimy – as this can provide further clues to its composition.
Once you have identified the stains, research suitable removal techniques tailored to each specific type. This targeted approach will help you effectively clean the concrete surface, preparing it for the epoxy coating, and ensuring a flawless finish that you can take pride in.
Cleaning Techniques
To effectively remove stains from concrete, consider utilizing targeted cleaning techniques tailored to the specific type of stain present.
For oil or grease stains, sprinkle baking soda or cornstarch over the area, let it sit to absorb the oil, then scrub with a stiff brush and rinse.
For rust stains, try a mixture of lemon juice and cream of tartar – apply, let sit for 10-15 minutes, scrub, and rinse.
Organic stains like mold or mildew can be treated with a mixture of vinegar and water – spray, let sit, then scrub and rinse.
Tougher stains may require a commercial concrete cleaner; make sure to follow the manufacturer’s instructions.
Remember, always wear protective gear such as gloves and goggles when using cleaning solutions.
Surface Preparation Tips
For effective surface preparation, start by implementing targeted stain removal techniques tailored to the type of stain present on the concrete.
Identify the specific stains on your concrete surface to choose the most suitable removal method. Oil stains can be treated with a commercial degreaser or a mixture of baking soda and vinegar. Rust stains often respond well to a combination of lemon juice and salt, left to sit before scrubbing. Tougher stains like paint or graffiti may require a solvent or paint stripper for complete removal. Organic stains, such as mold or mildew, can be tackled with a bleach solution or a commercial mold remover.
Always test any cleaning solution on a small, inconspicuous area first to ensure it doesn’t damage your concrete.
After applying the chosen stain removal method, thoroughly rinse the area with water and allow it to dry completely before proceeding with the epoxy coating application.
Etching the Concrete
Prepare the concrete surface by etching it to ensure proper adhesion for the epoxy coating. Etching is crucial as it opens up the pores of the concrete, allowing the epoxy to penetrate and bond effectively. To etch the concrete, you’ll need to use an etching solution, typically a mixture of water and muriatic acid.
Before starting the etching process, ensure that the area is well-ventilated and that you’re wearing proper protective gear such as gloves, goggles, and a mask. Mix the etching solution according to the manufacturer’s instructions in a plastic watering can or sprayer. Slowly pour the solution onto the concrete surface, starting from one corner and working your way across the entire area.
Using a stiff-bristled brush or a broom, scrub the solution into the concrete in a circular motion. This helps to remove any dirt, grime, or previous coatings that may prevent the epoxy from adhering properly. Once you have thoroughly scrubbed the surface, rinse it off with water and allow it to dry completely before proceeding with the epoxy application.
Etching the concrete is a vital step in preparing your surface for epoxy coating, ensuring a strong and long-lasting bond that will enhance the durability and aesthetics of your space.
Moisture Testing
Before you move forward with applying that epoxy coating to your concrete surface, make sure you conduct moisture testing first. Moisture in the concrete can cause adhesion issues and lead to a failed epoxy coating application. To prevent this, you need to ensure the concrete is sufficiently dry.
One common method for moisture testing is the plastic sheet method. Simply tape down a plastic sheet to the concrete surface, making sure to seal all edges completely. Leave it for at least 24 hours. If you see condensation or darkening under the plastic after this period, it indicates moisture is present and the concrete isn’t ready for coating.
Another method involves using a moisture meter specifically designed for concrete surfaces. Follow the manufacturer’s instructions to take accurate moisture readings at different spots on the concrete. Ensure the moisture content is within the acceptable range for epoxy coating application as per the manufacturer’s guidelines.
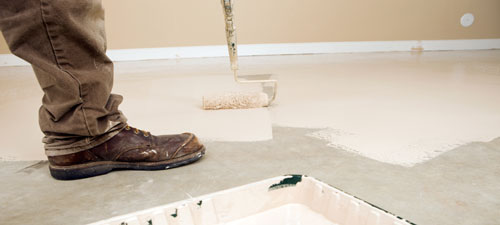
Applying a Primer
To ensure proper adhesion of the epoxy coating, the next step involves applying a primer to the dry concrete surface. Priming the concrete is crucial as it creates a strong bond between the substrate and the epoxy, ensuring a durable and long-lasting finish.
When applying the primer, make sure the surface is clean and free of any debris or dust. Use a brush or roller to evenly coat the concrete with the primer, ensuring that all areas are covered. Allow the primer to dry completely before proceeding with the epoxy application.
The primer not only enhances adhesion but also helps to seal the concrete, preventing bubbles or blisters from forming in the epoxy coating. It provides a smooth and stable base for the epoxy, allowing it to adhere uniformly and securely to the surface.
Choosing the right primer is essential for a successful epoxy coating application. Make sure to select a primer that’s compatible with both the concrete surface and the epoxy coating you plan to use. This compatibility will ensure optimal adhesion and a professional finish for your project.
Filling Joints and Gaps
When preparing to apply epoxy coating on concrete, it’s crucial to address joint preparation, gap filling, and seam sealing.
Ensure that joints are clean and free of debris before filling them with an appropriate sealant.
Use effective techniques to fill gaps and seal seams for a smooth and durable epoxy application.
Joint Preparation Tips
Ensure thorough cleaning of joints and gaps before proceeding with filling to promote proper adhesion of the epoxy coating. Clean joints and gaps by removing any dirt, debris, or old filler material using a vacuum, wire brush, or compressed air. This step is crucial to ensure that the epoxy coating bonds effectively to the concrete surface.
Inspect the joints and gaps for any signs of damage or deterioration. Address any cracks or spalling before filling them with epoxy. Repairing these issues beforehand will prevent further damage and ensure a smooth application of the epoxy coating.
Choose a high-quality epoxy filler that’s suitable for your specific project needs. Follow the manufacturer’s instructions carefully when mixing and applying the filler to achieve the best results. Properly filled joints and gaps will help create a seamless and durable epoxy coating on your concrete surface, enhancing its appearance and longevity.
Gap Filling Techniques
Prepare joints and gaps effectively for epoxy coating application by utilizing proper gap filling techniques. Gaps and joints in your concrete surface need to be filled to ensure a smooth and flawless epoxy coating.
To create a seamless finish, start by cleaning out the gaps using a vacuum or compressed air to remove any debris or dust. Next, choose a high-quality filler that’s compatible with epoxy coatings. Fill the gaps carefully, ensuring the filler is level with the surface of the concrete. Use a putty knife or trowel to achieve a smooth finish.
It’s crucial to allow the filler to dry completely before proceeding with the epoxy coating application. By filling the joints and gaps correctly, you’ll prevent air bubbles and imperfections in your epoxy finish, giving your floor a professional look that you can be proud of.
Seam Sealing Methods
To achieve a flawless epoxy coating application, focus on implementing effective seam sealing methods to fill joints and gaps in your concrete surface. Properly filling these areas is crucial to ensure a smooth and durable finish that will make your space feel complete.
Start by thoroughly cleaning the joints and gaps to remove any debris or dust that could interfere with the adhesion of the sealant. Next, choose a high-quality sealant that’s compatible with both your concrete surface and the epoxy coating you plan to apply. Carefully apply the sealant, making sure to fill the joints and gaps completely while creating a level surface.
Allow sufficient time for the sealant to cure before proceeding with the epoxy coating application. By paying attention to these seam sealing methods, you’ll create a strong foundation for your epoxy coating that not only looks great but also provides long-lasting protection for your concrete surface.
Final Surface Preparation
Before applying the epoxy coating, thoroughly inspect the concrete surface for any remaining imperfections or contaminants. It’s crucial to ensure that the surface is clean and free of any debris, oil, grease, or other substances that could affect the adhesion of the epoxy. Sweep the area and use a degreaser to remove any stubborn stains. Once the surface is clean, check for cracks, spalls, or uneven areas that may need to be repaired before proceeding.
After addressing any issues, the next step is to etch the concrete to create a rough surface for better epoxy adhesion. You can use an etching solution or mechanical methods like shot blasting or grinding. Make sure to follow the manufacturer’s instructions and safety guidelines when etching the concrete.
Once the surface is prepped and etched, rinse it thoroughly and allow it to dry completely before applying the epoxy coating. It’s essential to work in small sections to ensure even coverage and avoid inconsistencies.
Use a roller or brush to apply the epoxy, following the recommended thickness and number of coats for optimal results.
Frequently Asked Questions
Can Epoxy Coating Be Applied Over Existing Paint on Concrete?
Yes, you can apply epoxy coating over existing paint on concrete. However, it is vital to ensure that the previous paint is in good condition, clean, and properly prepped for adhesion to achieve the best results.
How Long Should You Wait Before Applying Epoxy After Etching?
Before applying epoxy after etching, you should wait for the concrete to dry completely. Typically, this takes about 24-48 hours. Ensure the surface is clean, dry, and free of any contaminants before proceeding with the epoxy coating application.
Do I Need to Wear Protective Gear While Applying Epoxy?
You should always wear protective gear when applying epoxy. Safety goggles, gloves, and a mask are essential to shield yourself from potential harm. Prioritize your well-being by taking these precautions during the application process.
Can Epoxy Coating Be Applied in Outdoor Spaces?
Yes, you can apply epoxy coating in outdoor spaces. Make sure the weather conditions are suitable, like low humidity and moderate temperatures. Clean the surface thoroughly and follow the manufacturer’s instructions for the best results.
What Is the Ideal Temperature Range for Applying Epoxy Coating?
For applying epoxy coating, aim for an ideal temperature range between 60-80°F. This ensures proper curing and adhesion. Remember, too cold and it won’t cure properly; too hot and it may dry too quickly. Find that sweet spot for success!
Conclusion
Now that you have prepped your concrete for epoxy coating application, you’re ready to achieve a smooth and durable finish.
By following these steps, you can ensure that your epoxy coating will adhere properly and last for years to come.
Remember to take your time and pay attention to detail during the preparation process for the best results.
Good luck with your project!